DANKLOOT · How to play
How to play
Everything dankloot asks of you and gives back, from the first step on the Camp Road to the Fissures past floor 30.
Free, runs in the browser, in development. The codex: every monster, boss, skill and unique, with the game’s numbers. What’s new: every change you can play, by day.
Take a hero from the camp down into a cursed crypt, one floor at a time. You steer with one thumb; the hero fights on his own and his skills aim themselves at the thickest crowd. Each level brings a point to spend on his skill tree (past level 30, every second level), where every skill, passive and evolution is in view from the first floor.
Deeper floors mean harder monsters and better loot, and everything you carry is at risk. Tap Town Portal on any floor, even mid-fight, to bank it for free, or tap Go down at the stairway and push your luck. On the way home the bag is sorted for you: upgrades (▲), uniques, set pieces, socketed items and runes reach the stash, and everything else becomes slag, with one line in town saying how much (“10 items salvaged → 31 slag”); Settings → Auto-salvage Off banks the whole bag instead. Every fifth floor is a boss.
How a dive goes
- Steer. Drag anywhere on a phone, or use WASD or the arrows. Your hero’s skills aim and fire on their own.
- Go home any time. Tap Town Portal, even mid-fight, and stand still 1.5 seconds: every coin, rune and ▲, unique, set or socketed item you carry is banked, free, and the rest is salvaged into slag on the way (the Last dive words say what it gave, “10 items salvaged → 31 slag”; Settings → Auto-salvage Off banks every item).
More
The cleared road, a waypoint home and a co-op return do the same. Escape, or the three-bar button in the top corner, opens the game menu anywhere, in a dive or in town: Resume, Settings, Gear (in a dive), Return to town (that same cast), Change hero, Invite a friend, Controls & help and Exit to start screen. Alone, the fight waits while it is open; with a friend it goes on.
- Explore the floor. The corner map shows where you have walked, and one gold arrow at the screen’s edge always points where to go next, with the tiles left: a quest’s spot once you have found it, otherwise the way on, from the first step of the Camp Road, where it reads “The Ringing Wood” and the distance.
The road, chapters 1 to 3
Chapter 1 is one walk, no stairs: the Camp Road runs off its far edge straight into the Ringing Wood (a short fade, no button), and the wood’s crypt mouth leads down into the Bell Crypts (the Upper Crypt, the Lower Crypt, then the Belfry’s boss). Chapter 2 is one walk too: past the Belfry you come out in the Drowned Marsh, and the Flooded Vaults’ mouth at the marsh’s far end leads down floor by floor (the Flooded Vaults, the Sea Caves, the Sluice Halls) to the Sluice’s boss. Chapter 3 starts below ground: past the Sluice you climb the Slag Gate and come out on the Rimepass, a frozen pass whose far end holds the gate of the Works, and the Works lead down floor by floor (the Works Halls, the Furnace Halls) to the Smelter’s boss.
The road, chapters 4 to 6
Chapter 4 is above ground again: past the Smelter you come out in the Overgrown Wilds, where a cleft drops into the Split Caves (a side cave with a shrine, not the way on) and the far edge runs into the Root Wilds; the Root Hollow’s mouth there leads down into the Rootdeep and on to the Heart Grove’s boss. Chapter 5 is the Bleached Reach, white salt country under a noon sun: past the Heart Grove you come out on the Salt Flats, where a cut in the salt cliff drops into the Cut Caverns (a side cavern where the salt surveyor waits, not the way on) and the far edge runs onto the Colonnades; the Brine Caverns’ stair at the Colonnades’ far end leads down into the Salt Galleries’ caverns and on to the Brine Pool’s boss. Chapter 6 is the Black Glass, and with it the whole road from the Camp Road to floor 30 is one world: past the Brine Pool you come out in the Glass Basin, where a crack in the basin wall drops into the Cracked Caverns (a side cavern with the Glass Shrine, not the way on) and the far edge runs onto the Ash Shelf; the Glass Deeps’ rift at the shelf’s far end leads down into the Glass Deeps and on to the Vitrarch’s floor.
Side areas, dens and hard fights
Every floor but a boss’s, the Camp Road included, is a fogged zone of wilderness, dungeon or caverns, with one to three side areas off the path: a chest, a shrine or an elite’s lair. Some packs are hard fights: a champion pack is up to five elites sharing one power, and from floor 6 most zones hold a unique pack, a named leader with an escort. Below floor 30 six more leaders wait, two from floor 31, then one each from floors 36, 41, 46 and 51: each stands on a deep monster’s body and carries his own pair of the four powers that are drawn on the ground before they act, plus one older power; a zone down there picks one of them before any name from above, and the town Codex names him once you have slain him. From floor 2 a zone’s lair can be a den, marked with a skull on the map from the moment you arrive: its pack is a champion or unique one, its items roll four floors deeper than the floor you are on, and its last kill drops one rare or better. Walking past it costs nothing.
- Level up and spend a point. Each level up to 30 brings one point, then every second level does, up to level 70, where the levelling ends (the XP you earn after it is counted and kept).
More
Each point waits on a glowing badge by your level, the fight never interrupted, until you tap the badge (or press B) to open the tree, over a paused fight when you dive alone (in co-op the fight goes on). There Auto-spend spends every waiting point the bot’s way in one tap, alone or in co-op, and a respec in town undoes any pick. If you would rather never stop for it, the tree’s “Spend my points for me” switch in town, off by default, makes each new point spend itself on the pick Auto-spend would make, with one quiet line by your level (“Point spent: Shatterguard · tap to choose your own”); tap that line, or take a point by hand, and the switch goes back off. In co-op each player’s points are his own: no one spends his partner’s. A point learns a skill while one of the six slots is free, adds a rank (up to five), or evolves a rank-5 skill whose passive you hold.
- Or bring a friend. In town, tap the Notice board beside the Waypoint stone (your hero walks to it), then Play with a friend and Create party, and send its invite link (Share or Copy). Your friend opens it and joins with their own hero, and you fight on the same floors, each at his own level.
Your level, and how many of you
A hero waiting in town from an earlier dive (home by Town Portal) brings his level, skills and kept tree into a party, an invite or a public game, and comes home alive with the levels he gained there. A hero with no dive waiting goes in at the level his town shows (his deepest waypoint’s, so a hero who has lit floor 30 joins a friend’s floor 1 as level 68, synced down to 1), never below his floor’s, and those levels stay in that game. Up to five of you share one party and one dive. In a party of friends a dive starts once two of you go down together, everyone in town when the leader picks the waypoint goes with them, and a member who arrives later joins the dive beside you; in a public game each of you goes down when you choose (below). Each hero past the first adds monsters and monster life (five of you face 3.4 times the monsters one player meets, each with 2 times the life, bosses 3.4 times), and the party bonus applies to everyone.
Parties
The Party button beside Town Portal lists each member with where he is: here, in town or away. The party lasts between dives. You all stand in the town square as your heroes, with your names. The party’s leader (the crown on the card) picks the waypoint, and everyone in town goes down together; the others’ main button reads “Waiting for <leader> to pick”. If the leader’s connection is gone for a minute, the lead passes to the member connected longest: the button counts down those seconds, and everyone reads one line when it moves. After the band’s boss you all land back in the same town, still a party, so the next dive needs no second invite. The leader can promote or remove a member, and anyone can leave.
On the floor together
Each of you sees and picks up only your own drops. The way down, or a road’s edge in chapter 1, waits until all of you still on the floor reach it. Whoever waits there is named on everyone else’s screen (“Bea waits at the edge to the Ringing Wood”), with a Go to button that takes you to their side after a 2-second channel. In a public game, where strangers can be far apart, the wait is a count instead: 15 seconds after the first hero reaches it, the whole party goes on together. The far ones are carried along as the downed always are, and each reads who took them on; stepping off the edge or the stairway stops the count. A friend who left does not hold you up, and nor does one who locks his phone or switches app: his hero stands out of the fight where he was until he is back. Every hero in the dive is drawn on your screen with his name tag in his colour. Each friend also gets his own arrow at the screen’s edge with his name, and his own ring on the corner map, both in his colour, never gold. The gold arrow is the same for all of you, so when it points at a quest’s spot or the way on, you are all sent to the same place.
When someone is down
A downed friend shows his revive ring where he lies. The nearest one off your screen gets an arrow at its edge with his name and “(down)”; when you are the one down, “Waiting for” names the nearest friend still standing. A downed friend holds your Town Portal, so that someone stays to lift him. But in a party of three or more, once he has been down 20 seconds he holds only the heroes within 24 tiles of him, and a held Town Portal says why in one line over your head (who is down, how far away, how long to wait). When you are the one down, nobody owes you a lift forever: after 15 seconds in a public game, or 30 seconds in a party of friends, a “Give up — fall” button shows under you. Two taps are exactly the fall you would take alone, never a free trip home. A fall with a friend is the same as alone: what you carry is lost and 75 % of your carried gold is kept. In a public game you land in that game’s town, one tap from going back down to the others. Until then your Town Portal and Return to town are dimmed, and a tap says how long is left.
Rejoining
Mid-dive the address bar holds your game’s link, so reloading the page offers one Rejoin your game, the host’s own game included. Left by mistake? Open the same invite link again and you are back beside your friend on the floor they reached, with an empty bag, because what you carried out is already in your stash. If your phone sleeps or the connection drops in a dive, the game holds your seat for 15 minutes while your hero waits out of the fight, taking no damage. Open Play again and its first button, Rejoin your party (with the floor and your friend’s name), takes you back into the same dive in one tap. If the dive ended while you were away, that card and your town say how in one line (your friend fell, went home or left the game), and whatever your hero carried is already in your stash. While you play together the game asks your phone to keep its screen on, where the browser allows it.
What you keep, and talking
Besides that fall rule, what a dive alone keeps is kept on your own hero too: a boss you kill together counts for your skill tree, its boss quest and your chapter; the monsters you meet and the uniques, set pieces and evolutions you find go into your codex; XP past level 70 counts towards Depth marks; and town’s Last dive counts your kills. Runes and slag you pick up with a friend go to your own stash, as alone: each rune is the find of the hero whose kill dropped it, and a fall loses it as a fall alone does. To talk, tap Ping for one of four signals (Come here, Help!, Loot here, Go down); there is no text chat. No account; it needs a live connection.
Public games: finding one
No friend free? Beside the Waypoint stone in town stands the Notice board; a gold dot on its corner means a public game has a seat you can take (not past your deepest waypoint) or an invite waits. Tap it, your hero walks there, and its panel opens: each open public game as a row of pictures (each hero’s portrait with his level, an empty square per free seat, and In town or Floor N), then Start a public game, Play with a friend, and your party if you are in one. Join on a row puts you in that game’s town, never straight onto a floor, while one of its five seats is free. If they are all below, your main button reads “Go to <name> — floor N” and takes you beside them only if you have lit the last waypoint at or above their floor; otherwise the row and the button read “Floor N · Too deep”, and a tap says how far ahead they are (a game with a player on an older page stays at two). Start a public game puts you in the town of the open public game with the most heroes in it (the newest on a tie), or makes a new one when none has a free seat. Either way you can walk, open the Smith, the Stash and the skill tree there at once, under a “Public game · 4 seats free” line.
Public games: the dive
In a public game nobody picks for you and nobody is moved. Your own pick at the Waypoint stone takes only you down and opens the game’s one dive on that floor. The others, still in town, see “<your name> → floor N” fade over the spot you left, your row and the board read floor N, and their main button reads “Go to <your name> — floor N”. That button puts them beside you in one tap (or says how far ahead you are if they have not lit a waypoint close enough). While that dive is open, every pick at the stone goes to it (unless it is too deep for you), because a public game has one dive at a time. Coming back from that dive lands you in that game’s town with the others, never in a town of your own: your Town Portal stands you there under “Back through your portal — floor N”. A fall while another hero still stands loses what you carried, exactly as a fall always does, and your main button reads “Go to <name> — floor N” to go back down beside them by the waypoint rule. A dive where every hero falls brings all of you to that town together. Reloading the page there offers Rejoin your game, which puts you back in the same town, or one line says “This game has ended.” if it has.
Leaving a public game, and asking for help
In a public game your hero keeps his own level and skills. Leave on the party card puts you back in the ordinary town, and while your town is locked private you stay out of public games. At a boss your partner has left you to, Ask for help puts your game at the top of that board.
Level sync: a stronger hero plays down
With two or more heroes in a game, a hero above the floor’s level is synced down to it (floor 5 is level 18, floor 6 level 20). His life and his damage are each cut to at most 1.3 times a level-18 hero’s on floor 5, his damage counted over his whole kit (his basic attack and every skill at its rank, with the hits each lands a cast and its area). His damage is measured once against a crowd and once against one lone foe such as a boss, each cut to that measure; how many monsters stand near him sets the cut he plays at moment to moment (one alone: the lone-foe cut; a pack: close to the crowd one). So a level-70 on floor 5 plays like a strong level-18 hero, not a level-70 one. He keeps every skill and its rank, every passive and tree node and every item effect, their numbers scaled with his damage. His level, XP and gear are never changed, so alone again he plays at his own numbers. While he plays synced, one short line by his level says “Synced to level N”, N the level he plays at (on floor 5, 18), and his Gear shows both numbers, the synced one first and his own beside it (“Life 169 (synced) · own 660”); the line goes the moment he is alone again.
Level sync: a weaker hero is bolstered
It works upward too: a hero more than 4 levels under the floor’s level is bolstered to the level just inside it. Floor 8 is level 24, so a hero under level 20 has his life and his damage each lifted to a level-20 hero’s, no higher; one already stronger stays his own. His line by the level then says “Bolstered to level 20”. A hero at or under the floor’s level whose own life or whole-kit damage is under 77 % of that level-20 hero’s (one who joined at the floor’s level with a lower hero’s skills and gear) is lifted to it the same way, his line naming his own level (“Bolstered to level 24” at level 24). A guest in a Fissure is bolstered to 66. A hero who joins a game starts at its floor’s level, so you mostly see this after the party has gone a few floors deeper than where you joined. A bolstered level is never saved: it lasts only in that game, and alone you are yourself again.
Your own loot, and helping pays
Loot stays at your own level, never the synced one: in a game of two or more, each drop is rolled for the hero it falls to as if on the deepest floor whose level is at or under his own, its item level, rarity odds, which uniques can drop and whether a set piece can (from floor 4) all going with it, so a level-70 on floor 5 finds floor 31’s loot (item level 31) and a level-10 on floor 20 finds floor 3’s; alone, the floor’s own loot falls. Helping pays too: when the party leaves a floor deeper together, a hero 10 or more levels above that floor’s level, with a friend there at least 10 levels under him, has helped on that floor; his first floor of helping in a game and every fourth after it pay one Fault shard (the smith’s Tempering currency, the same the Fissure wardens pay), and a line says “+1 Fault shard for helping” as the next floor opens, or how many floors to the next one. Floor 5 is level 18, so a level-70 taking a level-10 friend down from it is paid and the friend loses nothing. Only floors you came down onto count (not the one the game started on, nor one reached by a waypoint), heroes of the same level earn nothing, and an hour of helping pays less than an hour of tier-1 Fissures.
The together-chest
Reaching a floor’s end together opens a together-chest: when two or more of you leave a floor deeper by its stairway (or into a deeper zone), or stand in a Fissure’s arena when its warden falls (or a Deep fight’s boss), one chest opens for the party and each of you rolls one item of his own from it, magic or better, at his own level’s depth, straight into his own bag (a level-70 and a level-10 leaving floor 5 get one item of item level 31 and one of item level 3). On the road the chest stands beside you as the next floor opens and a line names your item; a warden’s goes home in your bag with the rest. It opens once a floor and only on a floor deeper than any that opened one in that game; a downed friend carried down, or one a public game’s count brings along, counts as reaching it; one whose link dropped (away) does not. Nothing is split and nobody can take yours. Alone it never opens.
- Take on quests. Each band is a chapter of three quests, 18 in all: on its second floor you free a captive or find what was lost, on its fourth you hold a sealed door or clear a lair, and its last is the boss. The first is on floor 2: free the Lamplighter at the Burnt Camp.
More
A quest line at the top of the screen says what to do, and the corner map marks the spot once you have seen it. Rewards grow with depth: +18 XP and a skill point your hero keeps on floor 2, then a chest and the floor’s waypoint on floor 4; from floor 14 the chest holds a unique. The Quest log in town (More) lists all 18. With a friend, each of you keeps your own quests: one finished on the floor counts for each of you who still had it open, never twice for a hero who already did it, and the co-op screen shows both players’ quest numbers, so you can see you are on the same one.
- Light waypoints. Twelve floors hold one, the first on floor 3. It stands on the road you walk (below ground, near where you come in from the mouth above) and lights as you walk within 3 tiles of it; a boss floor’s lights when the boss falls. Once lit, you can start a later dive there.
- Change gear mid-dive. I or C, or the bag button under the three bars on a phone, opens your bag: the ten worn slots, every item you carry and your hero’s numbers. Tap a carried item to see what it would change, then Wear: it goes on and the piece it replaces goes into the bag.
More
A ▲ on the floor or in the bag beats what you wear. Alone, Salvage all ▼ turns every carried item that is not ▲, unique, set or socketed into slag (a rare gives 3, plus 1 per 10 item levels). A ring has two slots: tap Ring 1 or Ring 2 first to choose the one it replaces, or Wear puts it over the ring its card names (“an upgrade over your ring 2”), and the other ring stays on. Alone, the fight waits while the bag is open. What you wear is safe: a fall loses what you carry, not what you wear, and your next dive starts at the level of its floor. With a friend, Wear works the same way, but the fight goes on while the bag is open, so step clear first; a friend still on an older copy of the game keeps a look-only bag until they reload. Three item lines change how a fight goes more than how big your numbers are: crushing blow, a chance for each hit to land double (at most 20 % from everything worn); life on kill, a share of your max life back on every kill (at most 6 %); and +1 to skills, one more rank on every skill you have, found only on rares of item level 11 or more (at most +2). A skill already at rank 5 gets a 10 % shorter cooldown for each rank past it instead.
- Push on, or fall. On floors 1 to 30 the way on is simply there (a mouth, a road’s far edge, or the way down below a mouth, as above); past the Vitrarch (floor 31 and every floor deeper), a finished floor opens a stairway down.
More
Its sign reads “Stairs down — walk to them” until you are within 2.6 tiles of it; there the Go down button shows and the sign changes to say so. Tap Go down (or press Enter) for harder monsters and better loot. Die and the items you carry are lost (you keep 75 % of the gold). Go home by Town Portal and your hero keeps his level, for his next dive from floor 1 or any waypoint you have lit (raised to that floor’s level if he is below it) or for a game with friends, but a fall ends the dive, and a new dive starts at level 1 on floor 1, or at level 10 from the floor 3 waypoint once you have lit it, and higher from each deeper one.
- Share the town. Out of a party, your camp is a shared one: up to four other players’ heroes walk it with you, each with his name, class and level over his head, fading in as they arrive and out as they leave. All that travels is your hero’s name, class, level and where he stands in the square.
More
The padlock in the top corner (“Shared”) makes your town private with one tap; that choice is kept on this device only, and a private town opens no connection at all. With no connection the town is simply yours alone, as it always was; in a party you stand in your party’s own camp instead. Tap another player’s hero in the square and a small card shows his name, class and level with Invite, or Join when he leads a party with a seat free: no link to send. Your invite reaches only him, as a note at the top of his town with Join and No (never a window over his game); his Join makes one party with you leading, and your waypoint pick takes you both down together. A No, or a minute with no answer, stops you inviting him again for five minutes; anyone can Leave the party and play alone; a private town receives no invites. A player whose page is older than this one shows no card when tapped.
Honest limits today: four heroes, at most five players per dive, together in a party by its invite link, by tapping another player’s hero in the shared town, or in a public game, whose town you share with its heroes and leave for its dive whenever you choose, and whose dive goes on to the next zone 15 seconds after one of you reaches the way on, whether or not the others have walked there (alone, a computer-played companion can join you), English only. Your stash lives in this browser only, with no account, so another device starts fresh. The art, the balance and the floors still change.
What’s in it today
A script counts this list from the game’s own code, so it holds only what you can play now. The codex names every monster, skill and item with its numbers; What’s new lists each change by day.
- 30floors, in 6 depth bandsFrom the Bell Crypts down to the Black Glass, each band with its own stone, light, monsters and music. Past floor 30 it keeps getting harder.
- 6bossesOne at the bottom of each band, from the Bellwright on floor 5 to the Vitrarch on floor 30. Each draws its attacks on the ground before they land.
- 26kinds of monsterFour in each of bands 1 to 5 and six in band 6 (three of them only below floor 30), from the slow husk to the saltreel that hooks you into its pack. Elites carry up to three of 10 powers, such as Swift and Ironhide.
Each band’s fourth monster
From floor 2 a fourth, the pelter, joins the first band’s packs: it keeps its distance and lobs a clod at the spot you stand on, and a red ring marks the landing 0.8 s ahead, so one step aside dodges it. The second and third bands get a fourth too. From floor 6 the keener hangs back and keens for 1.1 s inside a red ring at its feet, and when the keen ends the nearest sleeping pack wakes and comes, so kill it before the ring fills. From floor 11 the cindersower circles you dropping cinders that lie as dim rings and spark when you come near, bursting 0.75 s later. The fourth and fifth bands get one each as well. From floor 16 the burrkin spits a row of three red rings along the line from itself through you, landing 0.95 s later, so step across the line, not back along it. From floor 21 the spumecaster raises its ring where you are walking to, not where you stand, so turn or stop and it misses.
Stalkers, and three more below floor 30
From floor 11, up to two packs in an area are Stalking: they send one or two members after whoever hangs back, which mark a line on the ground for 0.6 s and then lunge along it, so a step to the side dodges the hit. A lunge that lands takes 30 % of your life before your ward cuts it, whichever hero you play, so that step is worth making. Until it lands, or for 4 s, a bright ring round the stalker shows a shield that soaks every hit: dodge first, kill it after. Below floor 30, and in every Fissure stage, three more join the packs: the shardback bursts into two smaller copies when it dies, the gloamveil’s violet ring halves the damage its pack takes until it falls, and the sinkfang sinks, grows an ember mark under you for 1.2 s and bites from it, so keep walking.
- 4heroes to playThe first Play opens Create a hero by the campfire, the Warrior, the Mage, the Bonecaller and the Mender side by side on one bar.
More
Tap one and he steps forward to show his move, his role and his three signature skills, with a name already suggested that you can change; Create & play puts you in town, two taps from the title. After that Play opens your list of heroes, each card saying where he stands, and in town the hero chip (his portrait, name and level) opens the same list: the Warrior fights up close, the Mage casts fire, frost and lightning from range, the Bonecaller fights through the dead he raises, the Mender heals, wards and hastes himself and whoever dives beside him. Keep up to 12 named heroes, several of one class if you like (+ New hero, the last card in your list of heroes, starts another on floor 1 with a name of his own); each keeps his own gear, skill tree and waypoints, and they share the stash and its gold.
- 55hero skills, plus 6 passivesThe Warrior’s 16, such as Faultline and Anvil Drop; the Mage’s 13, such as Ember Dart and Ashrain; the Bonecaller’s 13, such as Grave Call and Knacker Hound; the Mender’s 13, such as Searing Balm and Wellspring Hymn.
More
Up to six carried at once, five ranks each, and they fire on their own.
- 10gear slotsWeapon, off-hand, helm, chest, gloves, boots, belt, amulet and two rings.
More
Their % bonuses are “increased”: they add up with your passives and skill tree instead of multiplying, and a hero’s cooldowns stop at 40 % shorter, move speed at +40 % and swing speed at +75 %.
- 36item basesFour for each kind of item, such as the Iron Cleaver, Pit Axe and Notched Sword.
- 5raritiesNormal, magic, rare, unique and set.
- 7item setsThe Lamplighter’s Round, The Gravewarden’s Vigil, The Tinker’s Long Road, The Portreeve’s Watch, The Kilnwright’s Vestments, The Cairnherd’s Flock and The Dowser’s Circuit: 26 pieces. Two pieces of one earn a bonus, and a full set changes a skill.
- 54unique itemsEach with a power that bends a skill or a rule, such as The Threefold Rift: “Faultline splits into three narrower lines in a fan”.
More
They drop from floor 3 down. 35 of them belong to one hero each and drop only for him, from floor 3 (the Warrior’s 11, the Mage’s 8, the Bonecaller’s 8 and the Mender’s 8), such as the Mender’s Leechwort Rod: “Your mote heals you 1% of your max life when it strikes a foe carrying any ill”. Six more wait past floor 30, one first dropping on each of floors 31, 36, 41, 46, 51 and 56, such as Gravelmouth Cleaver: “A foe your basic attack kills takes 0.5 s off each of your skill cooldowns”. The last six drop on no floor at all: each of the Deep Three bosses past the Obelisk drops its own two, and its hearts buy them at the smith. 43 are build-changing (they change what a skill or your swing does, grant a skill, or turn a hit or a kill into a new effect) and eleven are steady (they only keep you alive or save time). The Codex in town counts the ones you have held, for your hero and for every hero, marks the build-changing ones even before you find them, and tallies set pieces and complete sets.
- 14runesSet in the sockets of plain gear; the right ones in order cut one of 9 inscriptions, such as Cinderwake, and the Smith empties a socket for gold.
- 55skill evolutionsA skill at rank 5 plus its matching passive evolves, such as Hatchet Toss + Quick Hands → Hatchet Storm.
- 3places in townA smith (upgrade and reroll for slag, or melt three items into one), a skill tree and a codex, besides your stash.
More
Walking the camp, the same gold arrow as on a floor stands beside your hero and points at one place: the Waypoint stone and the portal on its map while a dive is still open, else the stash when it holds an upgrade you could wear, else the smith when your slag can upgrade something you own, else, once you have cleared floor 30 and the Obelisk’s Fissures are open, the Obelisk, its label naming the tier of the key you can spend there (“The Obelisk — a tier-4 key”), else the Waypoint to go down once you have lit a waypoint (with none lit there is no arrow: the big Start at floor 1 button goes down in one tap). Once you open that place it leaves you alone until your next visit.
What it looks like
Screenshots of /play/ in a desktop browser at 1440 × 900, each from a saved dive resumed in the game itself. On a phone the same game fills the screen and the side panels fold away.
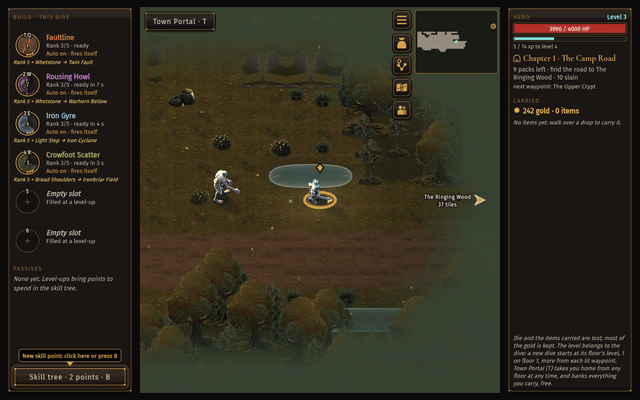
The Camp Road, floor 1. Where every new hero starts: a road above ground in daylight, with ponds, standing stones and oaks. The gold arrow at the screen’s edge names the next zone and the tiles left to it, from your first step; deeper floors are large zones under fog, and the corner map fills in as you walk. Staged with a test hero, nine seconds in. 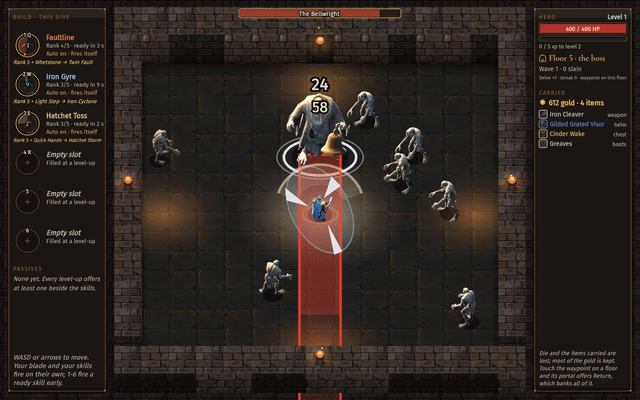
Floor 5, the Bellwright. The red band on the floor is his next attack, drawn before it lands: step out of it sideways. Staged with a test hero. At half life
At half life he and the Sluicewarden on floor 10 stagger, turn red and call a few of their band’s monsters out of the walls, then add one new attack: the Bellwright a wide ring round his own feet (walk out of it), the Sluicewarden a cone of water toward you (close in or get behind him). The four later band bosses do the same at half life: the Smeltreeve and the Mournroot add a ring dropped on your spot (walk straight out), the Brinemother a 9-tile lane toward you (step sideways), and the Vitrarch keeps his eclipse as that half’s attack.
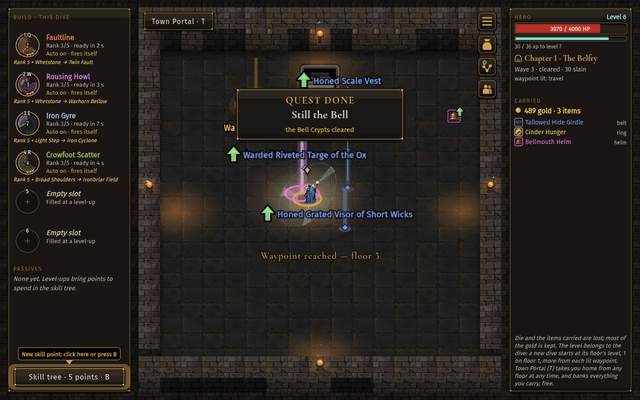
A unique’s beam, and the way down. The Bellwright dropped the Bellmouth Helm, a unique helm, and the pink beam marks its pickup. His fall finished the quest Still the Bell, lit the floor’s waypoint and opened the stairway down at the top of the room (under the quest card here): walk to it and tap Go down to go deeper, or tap Town Portal (top left) to take the helm home. Staged with a test hero. 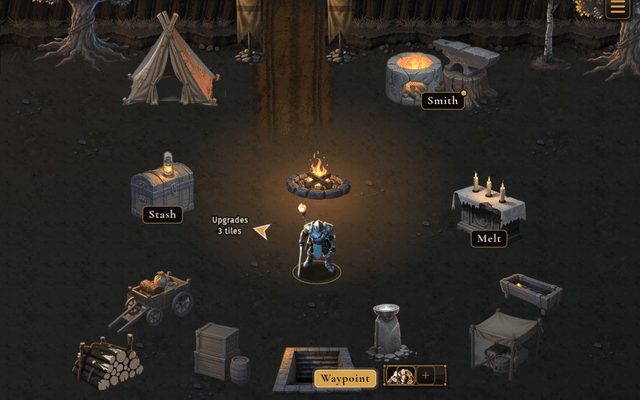
The town camp. Between dives you walk the camp and tap a place to use it: the Stash chest holds what you banked, the Smith spends slag (made from plain drops) on three tabs, Upgrade, Reroll and Salvage, where Salvage breaks a stash item you no longer want into 1 to 3 slag plus 1 per 10 floors; the candle-lit table labelled Melt in this older picture opens nothing now, and the Waypoint stone at the bottom sends you back down. 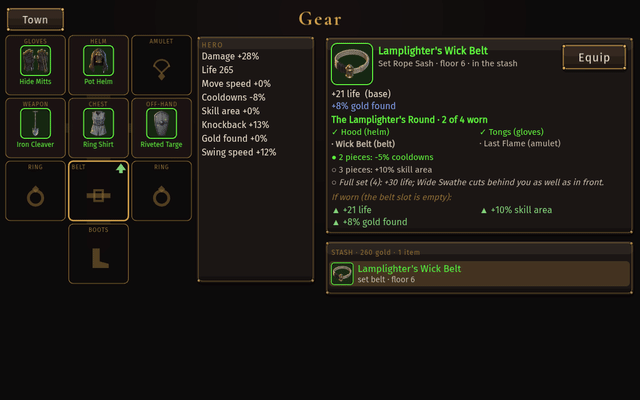
In town: gear. Ten slots, each worn item drawn as a painted picture, the hero’s totals and the stash. A set piece is selected: the card lists its set, ticks the pieces already worn, lights the bonuses they earn, and shows in green what equipping it would add. 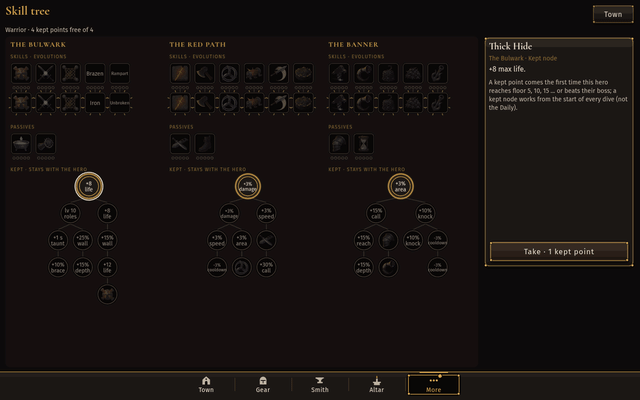
In town: the skill tree. In a dive, each level-up point waits, without pausing the fight, on a glowing badge by the health bar (on a wide screen, a Skill tree button in the side panel) until you open this same screen with it, with B, or with the Skills button (on a phone, at the left end of the skill row), which also opens it with no point waiting so you can plan. Staged with a test hero. The map, and the Warrior’s tree
The Map button at the row’s other end opens the full map, and a second tap shuts it. The Warrior’s three paths, The Bulwark, The Red Path and The Banner, show every skill, evolution and passive; the round kept nodes below take the points he earns the first time he reaches floor 5, 10, 15 and so on, and for beating each of their bosses, and those stay between dives.


The other three heroes
The shots above are the Warrior’s. These three were taken at 1440 × 900, mid-fight on floor 4: the Mage and the Bonecaller on 2026-10-08, the Mender on 2026-10-12.
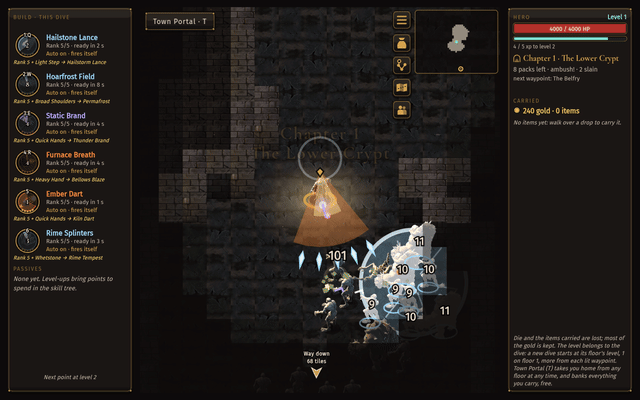
The Mage, floor 4. Everything you see is a spell casting on its own: the pale ring is Hoarfrost Field, the orange cone Furnace Breath, the ice Hailstone Lance and Rime Splinters. Staged with a test hero. 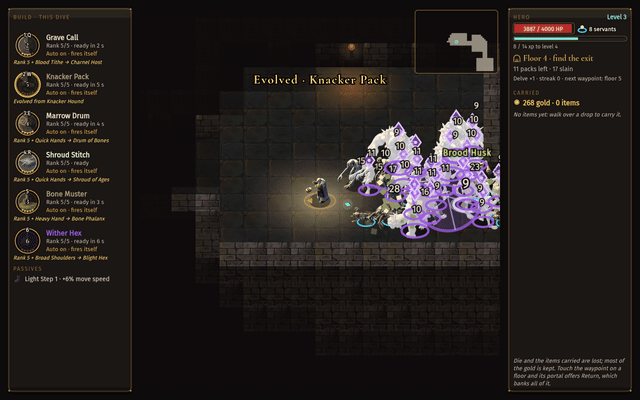
The Bonecaller, floor 4. He stands back while his bone thralls and hounds, each on a cyan ring, hold the pack; the violet rings and diamonds mark Wither Hex, his curse, which makes them take more from every hit. Staged with a test hero. 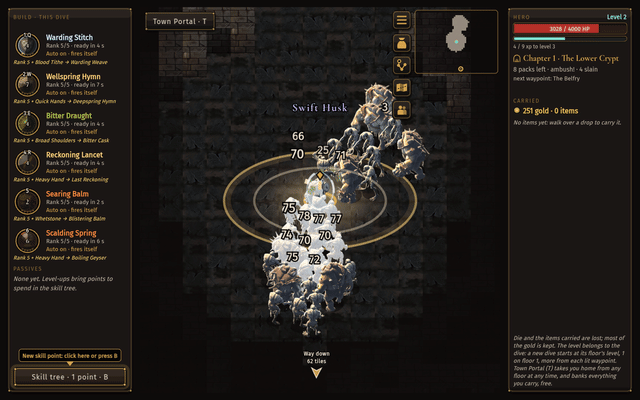
The Mender, floor 4. The healer fights too: the golden ring is Wellspring Hymn, healing him and any hero inside it; the pale shell round him is Warding Stitch, a ward that soaks hits; Bitter Draught curses the pack to take more from every blow, and Reckoning Lancet cuts deeper for each ill already on its target. Staged with a test hero.


The three lands above ground
Not every floor is a crypt. Each is a saved dive resumed on that floor at 1440 × 900 and cut to the play field: the Greenway on 2026-10-20, the hero walked into the Camp Road’s hold ring; the Rimepass and the Bleached Reach on 2026-10-09, the hero left standing for six seconds while the first monsters reach him.
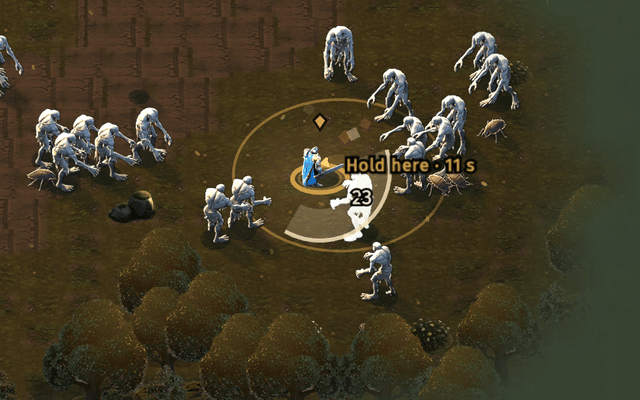
The Greenway: holding the line on the Camp Road, floor 1. Step into a gold ring and it starts: monsters close in from four to seven tiles out while you stand your ground for 14 seconds, the label counting down. Walk out for 5 seconds and the hold gives up and waits for you again. Staged with a test hero. 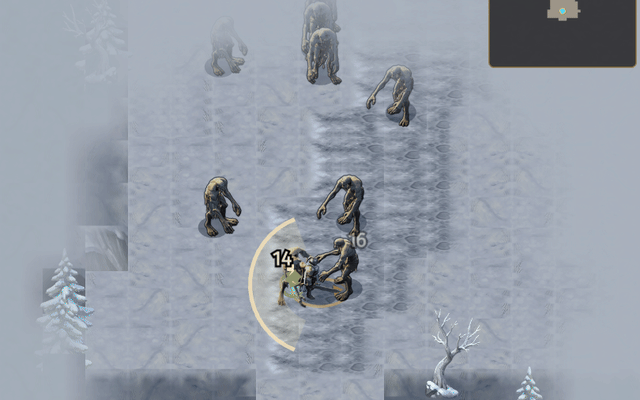
The Rimepass, floor 12. The Cinder Works’ one floor above ground is this snowfield, with the band’s own monsters; every figure is drawn darker so it stays readable on the snow. Staged with a test hero. 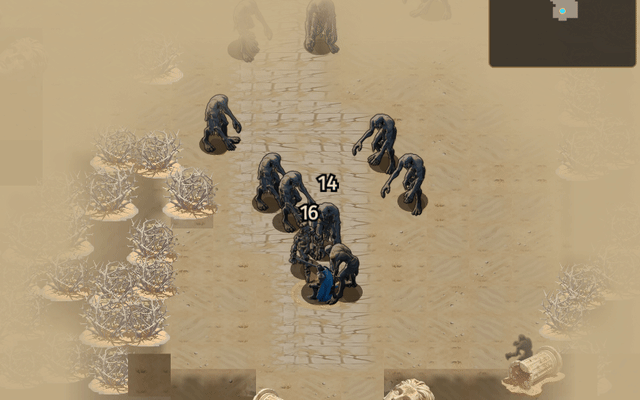
The Bleached Reach, taken on floor 22. Pale sand under a noon sun on the Salt Galleries’ two floors above ground, now floors 21 and 23, with a fallen statue where other lands have trees. Figures are drawn darker still here, so the pack reads almost black. Staged with a test hero.


After floor 30
Bring down the Vitrarch on floor 30 and the Obelisk in town wakes: each key opens a timed Fissure, two zones and a warden on a 10:00 clock. Kill the warden in time for a key one tier up (two under 6:00). Your first key is free, and so is the next whenever you run out.
The clock, falling and leaving
The clock keeps running when you fall: you get back up at the zone's entrance 5 seconds later at full life, those 5 seconds gone from the clock, and for 3 seconds (or until you move) nothing closes in on you. Past 10:00 the clock counts on, and a late kill still gives back a key of the same tier. Every tier gives its monsters 7% more life and 4% more bite. Leaving by Town Portal or the menu, or closing the page mid-run, spends the key with none back, and the Obelisk names that run once.
Personal bests
The Obelisk card also keeps your personal bests: the highest tier each class has cleared in time on this device (two Warriors who cleared tiers 3 and 7 read Warrior tier 7, and a retired hero's best stays), and this week's best of your own heroes with the hero who set it, emptied every Monday at 00:00 UTC. They live on this device only: no ranking, no other players, nothing sent anywhere. The list starts with your first clear in time after 28 October 2026; earlier clears are not counted.
Fault shards: Temper and Hone, and Omens
Every warden drops Fault shards, 2 below tier 5 and one more each five tiers after (half again with the Leaden Omen). The smith spends them to Temper any item you keep, uniques and set pieces too: up to item level 30 plus your best cleared tier, 1 shard a level and 5 at least. Shards also Hone a magic or rare item: pick one of its lines, and the smith offers two new lines of the same tier beside the old one. Whichever of the three you keep costs 3 shards, plus 1 for every 3 tiers of the line and 1 for each earlier hone of that item (5 more at most, so never over 11). On the smith's Salvage tab, three Omens of one kind trade for one of the kind you want.
Depth marks, titles and ring colours
Past level 70, every 3,083 XP becomes a Depth mark you spend in town on a small permanent gain, such as +0.5% damage or +3 life, up to 20 marks on each of six stats. After the 120th mark your XP keeps counting: it earns ten titles, the first (Deepfarer) 30,830 XP past the last mark and each later one a step longer. A title shows on your hero card and over your head in town, and in co-op on the party card and on your tag in the shared town. Titles 2, 4, 6 and 8 each open a colour for the ring at your feet (Ember, Bone, Azure, Orchid), picked on the Obelisk card; a co-op partner sees it on your ring and name plate (Gold leaves both as they were). And a slow Depth echo adds extra damage, +2.5% after another 369,960 XP and never reaching 5%.
Old bosses, risen, on the stairs
Keep taking the stairs instead and every fifth floor past 30 brings back an earlier boss, risen: the Bellwright Risen on floor 35, then the Sluicewarden, the Smeltreeve, the Mournroot and the Brinemother on 40, 45, 50 and 55. Each has as much life as the Vitrarch would have at that depth, and one extra attack borrowed from another band’s boss (the Bellwright Risen throws the Smeltreeve’s slag spray), drawn on the ground before it lands like every other. Floor 60 is the Vitrarch again, and the cycle repeats.
Past floor 30 the stairs keep going down into the Deep, which wears each band’s stone in turn under a darker light (floors 31 to 35 the Bell Crypts’ halls and caves, 36 to 40 the Drowned Ossuary’s, on to the Black Glass on 56 to 60, then round again) while its monsters stay the deep’s own mix, and the HUD, the map and the waypoint list name where you are, as in “The Deep · Floor 33 · below the Bell Crypts”.
A tier-10 key: the Cindercoil
Clear floor 30 and the Obelisk in town opens Fissures: timed runs on a key whose tier climbs each time you clear one inside 10 minutes. A key of tier 10 or more can instead be spent on the Cindercoil, a boss with three times floor 30’s boss life before the tier’s own scaling (about 5.5 times it on a tier-10 key). It closes rings of fire on you with one gap to slip through, then lunges across the arena, faster in its third phase. You get one life and 5 minutes before the arena floods, and win or lose the key is spent. A kill pays a Cinder heart and three rares at item level 30 + the tier, each with a 1 in 10 chance to be Coilbrand and another 1 in 10 to be Ashen Spiral instead; five hearts buy either one at the smith.
The Hushwarden and the Last Bell
A tier-20 key opens the Hushwarden instead: it puts out the light, so the arena is dark except where its attacks glow, and calls monsters back into the fight. A tier-30 key opens the Last Bell: every toll is a wave of force from a new side with one gap to slip through, and below half life it rings faster (0.8 seconds between tolls instead of 1.3). Each follows the Cindercoil’s rules for life, the flood and the rares, with its own heart (Hush heart, Bell heart) and its own two uniques (Mute Lantern and Quietstep; Tollmaker and Echo of the Bellwright).
Fissures and these bosses with a friend
Fissures and these bosses can be played with a friend too. The host must have beaten the Vitrarch and spends his own key; his guest need not have. A guest under level 66 keeps his own level and skills, but for that run the room raises his life and his damage to a level-66 hero’s of his class (nothing of it is saved). A Fissure cleared in time puts a key of a higher tier in the stash of each player who has beaten the Vitrarch (the guest spent nothing; one who has not earns no key, though the warden’s shards and his Omens are still his), and a boss kill pays each player his own heart and rolls.